Camellias need four things to thrive: the right climate zone (generally USDA zones 6–10), acidic and well-draining soil with a pH between 5. Virginia Tech Extension notes that Camellia japonica can tolerate very acidic soil pH levels, with a reported soil pH range of about 3.7 up to 6.5 blank" rel="noopener noreferrer">soil pH range can be as low as about 3.7 up to 6.5. 5 and 6.5, filtered light rather than harsh direct sun, and consistent moisture without waterlogging. Get those four things right and camellias are surprisingly low-maintenance. Get even one of them badly wrong and you'll spend years wondering why your plant looks miserable and never blooms.
What Do Camellias Need to Grow: Zone and Care Guide
Marcus Hartwell
22 May 2026
This guide walks through each requirement in practical terms, with a clear eye on geography, because whether camellias will actually work for you depends heavily on where you live. If you're wondering where do camellias grow best, start by matching your local USDA growing zone to the plant's cold tolerance and light needs. A gardener in coastal Georgia has a completely different starting point than someone in Michigan or Colorado, and the advice needs to reflect that.
Climate and Hardiness: Will Camellias Survive Your Winters?
Most camellias are reliably cold-hardy in USDA zones 7 through 10. That covers a wide swath of the American South, the Pacific Coast, and parts of the mid-Atlantic. Camellia japonica, the classic flowering camellia, handles zone 7 winters fine and thrives in zones 8 through 10. Camellia sinensis (tea camellia) and some cold-hardy cultivars like 'April Dawn' or 'Winter's Star' have been bred to handle zone 6, surviving temperatures down to around -10°F with the right site and some protection.
Zone 6 is really the northern edge of realistic camellia growing outdoors. Once you get into zone 5 territory and colder (think most of Michigan, Minnesota, or the mountain West), outdoor camellias become a losing battle unless you're growing them in containers you bring inside. If you live in Michigan and are wondering whether camellias can survive outdoors, the cold tolerance in your area matters more than anything else do camellias grow in michigan. The plant's buds and roots simply can't handle sustained deep freezes. If you're in a borderline zone like 6a or 6b, site selection matters enormously: a south-facing wall, shelter from north winds, and proximity to a structure that retains heat can make the difference between a plant that makes it and one that dies back to the roots every winter.
Heat is the other side of the coin. Camellias don't love extreme summer heat, especially dry heat. They can grow in zone 10, but in areas with scorching, arid summers, they need shade and extra water to get through without dropping leaves or setting fewer buds. Humid heat, like you find in coastal Texas or Florida, is more tolerable for them than the dry heat of the Southwest. In addition to humid coastal Texas, camellias can also do well in many parts of the state if you match the right zone and growing conditions.
If you're researching whether camellias will work in a specific state or region, places like Texas, Michigan, Colorado, and India each have their own set of climate variables that change the answer. If you're in Colorado, can camellias grow in Colorado is a good starting point to compare your local temperature swings and winter-hardiness limits. For a quick regional reality check, you can compare India’s conditions to the climate variables discussed for places like the American South and other zones, including heat and winter hardiness. Texas, for example, spans zones 6 through 10, so whether camellias grow there depends entirely on which part of Texas you're in.
Light: Shade, Sun, or Something In Between?
Camellias want bright, indirect light or dappled shade for most of the day. In practice, that means morning sun with afternoon shade is close to ideal, especially in zones 8 and warmer where afternoon sun can be intense. Under a high canopy of pines or oaks, or on the east side of a house, camellias do very well. Full shade all day will reduce blooming significantly. Full afternoon sun in a hot climate stresses the plant and can scorch leaves.
In cooler climates (zones 6 and 7), camellias can tolerate more sun exposure because the light is less intense and temperatures are lower. A spot that would scorch a camellia in zone 9 might be perfectly fine in zone 7. If you're in the Pacific Northwest, for instance, camellias often handle more open sky than they would in the South because the sun angle and temperatures are much more moderate.
One important note: avoid planting camellias in spots where winter sun directly hits frozen buds in the morning. Rapid thawing causes bud damage. A location with some morning shade in late winter, even if it gets sun the rest of the year, can noticeably protect early-blooming varieties from bud drop.
Soil: Get This Right Before You Plant Anything Else
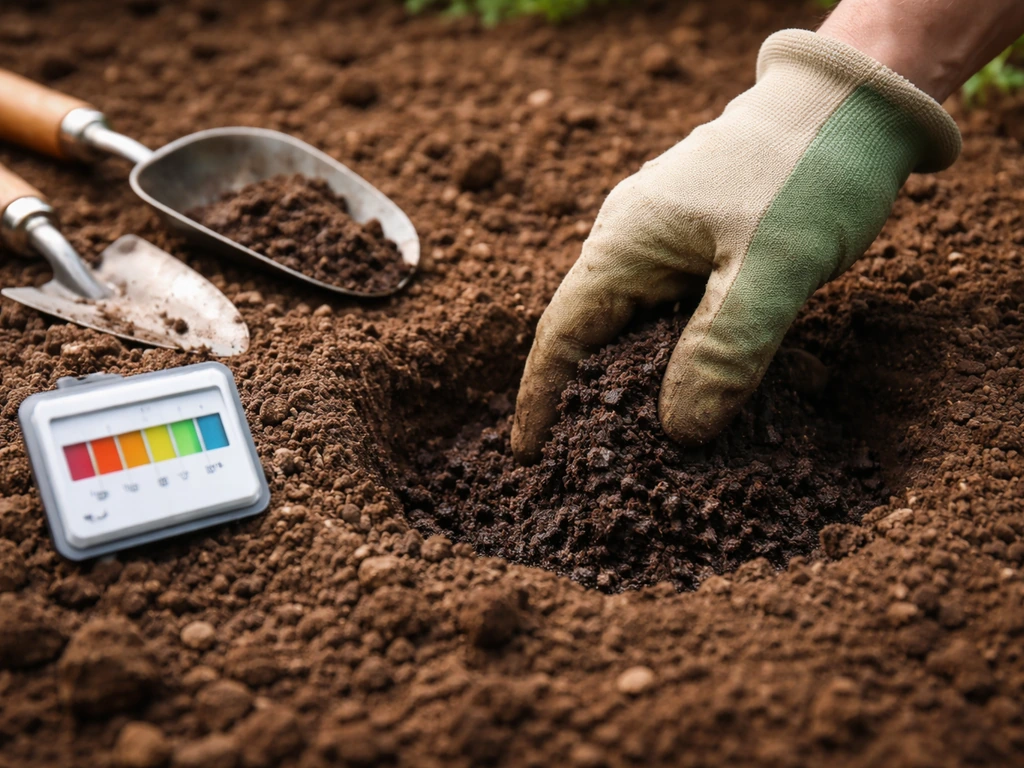
Soil is where most camellia failures start, and it's also where you have the most control before planting. Camellias need acidic soil, ideally with a pH between 5.5 and 6.5. The American Camellia Society is very specific about this range, and for good reason: outside of it, nutrient uptake becomes unreliable even if those nutrients are present in the soil.
At a pH above 6.5 to 6.7, iron becomes increasingly insoluble in the soil, and camellias start showing iron chlorosis (yellowing leaves with green veins) even when iron is technically present. Alkaline soils, common in many parts of the Southwest, Rocky Mountain states, and areas with limestone bedrock, create chronic nutrient problems for camellias that are very hard to fix long-term. If your soil is naturally at pH 7.5 or above, growing camellias in-ground is an uphill fight. Raised beds with specially mixed acidic growing media or large containers with an acidic potting mix are a much better approach in those areas.
Beyond pH, camellias need soil with good organic matter and excellent drainage. A rich, loamy soil with plenty of compost mixed in is ideal. Heavy clay that holds water is a serious problem because it sets up the conditions for Phytophthora root rot, which can kill an established plant. Sandy soil drains fine but may dry out too fast and needs more frequent watering and organic matter to retain some moisture. When planting, mix aged compost or pine bark into the planting hole and surrounding soil. A 2 to 3 inch layer of organic mulch (pine bark or pine straw work great) over the root zone keeps soil temperature stable, retains moisture, and slowly adds organic matter as it breaks down.
| Soil Condition | Effect on Camellias | What to Do |
|---|---|---|
| pH 5.5–6.5 | Ideal nutrient uptake, healthy growth | Maintain with acidifying fertilizer and pine bark mulch |
| pH above 6.7 | Iron chlorosis, yellowing leaves, poor growth | Amend with sulfur, use raised beds, or grow in containers |
| Heavy clay | Poor drainage, Phytophthora root rot risk | Amend heavily with compost and bark, plant on slight mound |
| Sandy soil | Dries out fast, low nutrients | Add compost, water more frequently, mulch deeply |
| Good loamy soil | Consistent moisture and nutrition | Maintain with compost top-dressing and mulch |
Watering and Fertilizing: Consistent Without Being Excessive
Watering
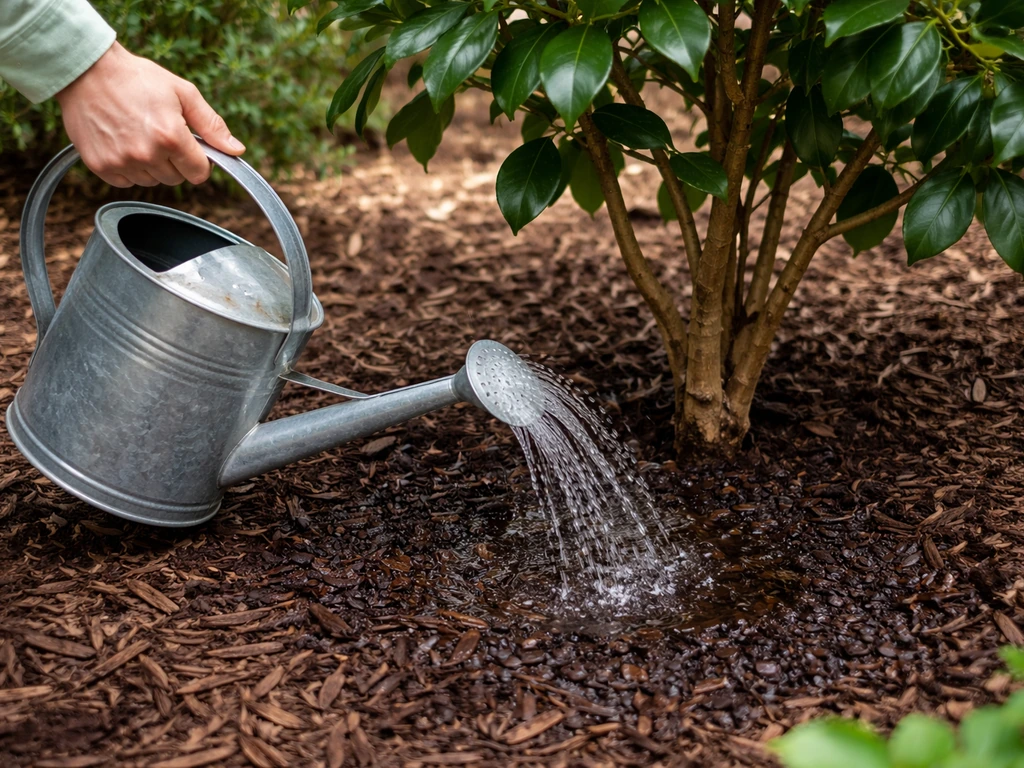
Camellias like consistent moisture, especially in their first two years while they're establishing roots. The rule of thumb is to water deeply and then allow the top inch or two of soil to dry out before watering again. Waterlogged soil is genuinely dangerous. The Phytophthora cinnamomi fungus that causes camellia root rot spreads through swimming spores in saturated soil water, and once it takes hold it's very hard to reverse. Always let excess irrigation drain away before the next watering cycle.
During hot, dry summers, established camellias may need weekly deep watering. During cool, rainy seasons, you may need to water rarely or not at all. A soil moisture check (push your finger two inches into the soil near the root zone) is more reliable than a fixed schedule. In fall, consistent moisture is especially important because this is when camellias are setting their flower buds for the following season.
Fertilizing
Feed camellias with a fertilizer formulated for acid-loving plants, something labeled for azaleas, camellias, and rhododendrons. Apply in early spring as new growth begins, and again in late spring or early summer. Do not fertilize after midsummer (July in most zones) because late feeding pushes tender new growth that can be damaged by early frost. Camellias in poor soil or containers may benefit from a third light application in late spring, but less is more with fertilizing: over-fertilizing promotes lots of foliage at the expense of flowers and can burn roots.
If you're seeing yellowing leaves and suspect iron deficiency from high soil pH, a chelated iron supplement can provide temporary relief, but the real fix is correcting the pH. Foliar sprays of chelated iron work faster than soil applications, which is useful if you need a quick fix while you work on soil pH over the longer term.
Seasonal Timing: When to Plant, Prune, and Expect Blooms
Camellias have two main species with different bloom windows, and knowing which one you have affects your timing decisions significantly. Camellia japonica blooms in late winter to spring, roughly January through April depending on your zone and cultivar. Camellia sasanqua blooms in fall, typically October through December. Both set their buds in summer and early fall, which means any stress during that period (drought, heat, excessive fertilizer) directly reduces the following season's flower count.
- Best planting time: Fall in zones 7–10 gives roots time to establish before heat. Spring works too, but requires more attention to watering through summer.
- Bud set window: Late summer to early fall. Keep soil consistently moist and avoid heavy pruning or fertilizing during this period.
- Pruning window: Right after flowering ends. For japonicas, that means late spring (April to May). For sasanquas, prune in late winter before spring growth. Never prune in summer or fall or you'll cut off developing buds.
- Mulching timing: Apply or refresh mulch in late fall before winter in colder zones to protect roots, and in late spring to retain summer soil moisture.
- Winter protection: In zones 6 and 7, wrap young or marginally hardy plants with burlap after the first hard frost, and protect root zones with 4 to 6 inches of mulch.
Troubleshooting Common Problems Across Regions
Bud Drop
Buds forming and then dropping before they open is one of the most frustrating camellia problems, and it's usually caused by one of three things: sudden temperature fluctuations in late winter (rapid freeze-thaw cycles), inconsistent watering during bud development in late summer and fall, or root stress from poor drainage. In colder zones, protecting the plant from harsh winter winds and morning sun on frozen buds reduces this significantly. In the South, a mid-fall dry spell that goes unwatered is often the culprit.
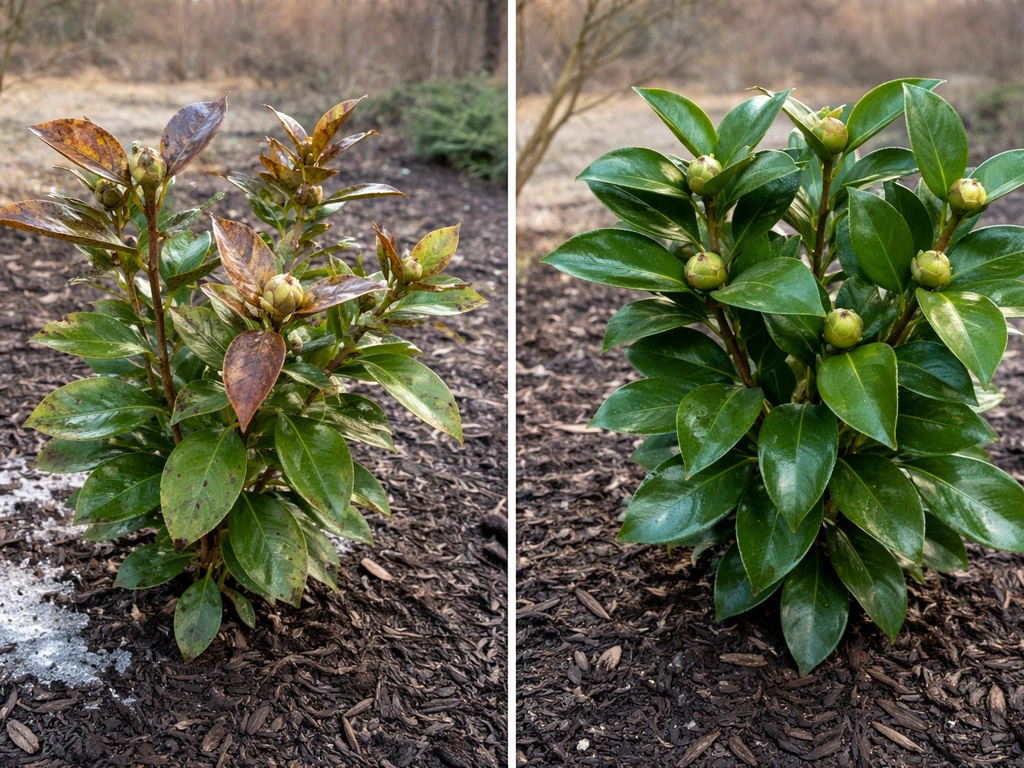
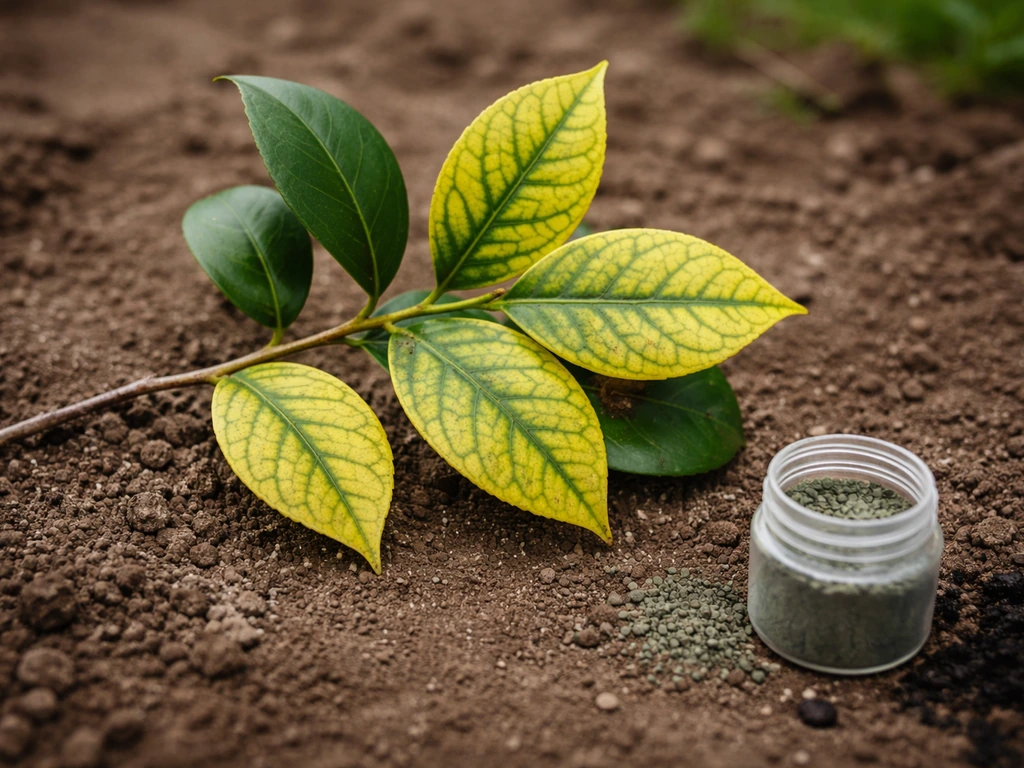
Yellowing Leaves (Chlorosis)
Yellow leaves with green veins is classic iron chlorosis and is almost always a soil pH problem. If your soil is above 6.5 to 6.7, iron locks up and the plant can't access it even if you've applied iron fertilizer. Test your soil pH first before throwing anything at the plant. Sulfur applications can lower pH over time (it's not immediate, so plan on months, not weeks). For a faster fix, chelated iron as a foliar spray gets the plant through the season while you work on the underlying pH.
Root Rot
Root rot caused by Phytophthora cinnamomi is one of the most serious camellia killers, and it thrives in exactly the conditions many gardeners accidentally create: overwatering or planting in poorly draining clay soil. Symptoms include wilting despite moist soil, yellowing leaves, and eventually sudden dieback. Prevention is the only real cure. Plant in well-draining soil, never let the plant sit in standing water, and avoid planting too deeply (the root collar should be at or just above soil level). If you suspect root rot in an established plant, improving drainage and cutting back watering is the first step; fungicide drenches with phosphonate-based products can help in early stages.
No Blooms
A camellia that grows fine but never flowers is usually getting too much shade, was pruned at the wrong time (removing the developing buds), or was overfed with nitrogen fertilizer (which pushes vegetative growth instead of flowers). Check all three before assuming something more serious is wrong. Also make sure the plant is old enough: young camellias often take two to three years after planting to settle in and produce a full bloom display.
Heat and Winter Damage by Region
Gardeners in colder zones like 6 see winter dieback on tips and sometimes major branches after harsh winters. If this happens, wait until late spring before pruning out dead wood so you can clearly distinguish what's dead from what's just slow to leaf out. In hot, arid climates like much of the Southwest or inland Texas, summer leaf scorch (brown crispy leaf edges) is more common and is driven by heat stress, low humidity, and sometimes root stress from inconsistent watering. Shade cloth during peak summer heat and a deep mulch layer over the root zone help significantly. For gardeners in particularly challenging climates, including Colorado or the Upper Midwest, it's worth researching the specific cold tolerance question for your state before investing in a full landscape planting. In tough climates, choosing the right camellia type and adjusting light, soil, and watering can make growth much more reliable specific cold tolerance question. Whether gardenias can handle Colorado weather depends on your local temperatures, winter protection, and choosing a cold-tolerant variety.
Your Quick-Start Checklist After Buying a Camellia
- Test your soil pH before planting and amend if it's outside the 5.5–6.5 range
- Choose a site with morning sun and afternoon shade, protected from strong winter winds
- Dig a hole no deeper than the root ball and two to three times as wide; mix compost into native soil
- Plant with the root collar at or slightly above ground level, never buried
- Water deeply right after planting, then establish a consistent watering routine
- Apply 2 to 3 inches of pine bark mulch over the root zone, keeping it away from the trunk
- Wait until late spring or after the first flush of growth to fertilize with an acid-formulated fertilizer
- Mark your calendar for post-bloom pruning so you never accidentally cut off next year's buds
FAQ
Can I grow camellias in containers if my soil or zone is borderline?
Yes, but your container must drain fast and keep roots insulated from winter freezes. Use an acidic potting mix, ensure the pot has drainage holes, and avoid letting saucers collect runoff. In zone 6 and colder, many gardeners move containers to an unheated garage or wrap the pot, not just the plant, because root freeze is what usually ends outdoor container camellias.
If my soil is slightly too alkaline, can I still plant camellias in-ground with amendments?
A reliable way is to test soil pH and, if needed, also check for “active” drainage problems before planting. If water pools after watering or the soil stays wet for days, you likely have a drainage issue that pH alone cannot fix. In that case, raised beds or mounded plantings with improved drainage media typically outperform in-ground fixes.
How often should I water camellias during bud season so they do not drop buds?
Use a soil moisture check during bud formation (late summer into fall), and water only when the top 1 to 2 inches start to dry. Camellias suffer more from inconsistency than from a strict schedule, so don’t “skip because it rained once” if the root zone dried out later. In hot weather, deep watering once per week may work, but in cooler, rainy seasons you may need little to no irrigation.
What is the right way to mulch camellias, and how close should mulch be to the plant?
Mulch should be 2 to 3 inches thick, but keep it away from the trunk so the crown does not stay damp. Also avoid piling mulch right up to the root collar, since that can worsen rot risk in poorly draining spots. A pine-bark style mulch is often slower to compact, which helps airflow at the root zone.
When is it safe to prune camellias without reducing next year’s blooms?
Skip pruning right after flowering. Since buds form in summer and early fall, the safest general approach is to do light shaping right after bloom ends and save major pruning for a time when you are not removing the developing bud set. If you must prune in colder zones, do so after late spring once you can clearly see live growth.
My camellia looks healthy but never blooms, what are the most common causes and fixes?
Do not guess with nitrogen. If leaves are lush and dark green but flowers are absent, reduce or pause nitrogen and check shade first. A common mistake is fertilizing too late, which can push tender growth and increase frost injury, and frost injury around bud set often looks like “no bloom” later.
If I see yellow leaves with green veins, should I use iron immediately or fix pH first?
Test before treating for iron chlorosis. If the pH is above about 6.5 to 6.7, chelated iron is often temporary because the underlying lock-up remains. Foliar chelated iron can green the plant quickly, but the long-term fix is lowering pH gradually with appropriate soil amendments over months, not weeks.
What should I do if I suspect Phytophthora root rot in an established camellia?
Yes, but use it as an early-stage tool, not a cure for chronic bad drainage. Improve drainage first, then adjust watering so the soil never stays saturated. If you suspect root rot and the plant is declining fast, dig carefully and assess root health, because some Phytophthora cases recover only when caught early.
My camellia buds are dropping, but leaves look fine, what’s the first thing to check?
Birds, insects, and even fungal leaf spots can cause problems, but when bud drop happens before blooms open, focus on the “big three” first: late-winter freeze-thaw swings, uneven watering during late summer and fall, and root stress from poor drainage. Most other pest or disease issues do not directly explain buds dropping right as flowers would be preparing to open.
In zone 6, how can I reduce winter dieback and what should I do after a harsh winter?
If you see twig dieback or plant-wide decline after winter, wait until late spring to prune dead wood so you do not cut living stems. Also inspect the root collar level, sometimes replant depth issues or buried collars worsen winter injury. For borderline sites, wind protection and avoiding morning sun hitting frozen buds can noticeably reduce bud and stem damage.