Yes, hibiscus absolutely grows from stem cuttings, and it's one of the most reliable ways to multiply your plants. A healthy semi-hardwood cutting taken at the right time of year, prepped correctly, and kept warm and humid will root in roughly 4 to 6 weeks. Whether you're in a warm Southern state or a cooler Northern zone, the method is the same, but your timing and setup will shift a bit depending on your climate.
Can Hibiscus Grow From Stem Cuttings? How to Propagate
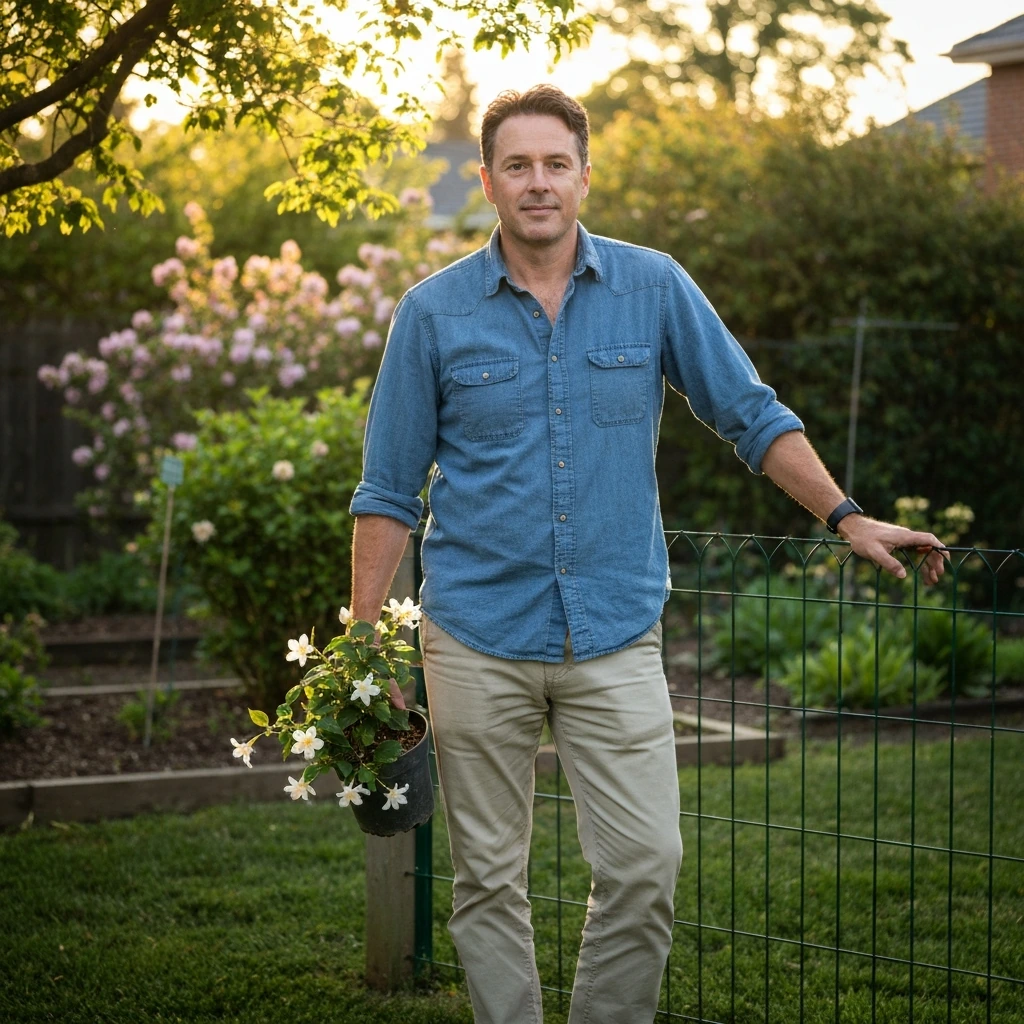
Marcus Hartwell
22 May 2026
Which hibiscus types this works for (and what 'stem' really means)
Stem cutting propagation works best for tropical hibiscus (Hibiscus rosa-sinensis), the classic glossy-leafed shrub with big showy blooms that you see all over Florida, Texas, California, and the Gulf Coast. Hardy hibiscus (like Hibiscus moscheutos) can also be propagated from stem cuttings, but it's a bit more finicky and slower. However, blank" rel="noopener noreferrer">tropical hibiscus can be more reluctant or slow to root compared with other hibiscus types, so expectations should match that reality. When most people ask whether hibiscus grows from stem, they're usually asking about their tropical patio hibiscus, and the answer is a confident yes.
When growers talk about a 'stem cutting,' they mean a piece of stem that includes at least two or three leaf nodes, not just a leaf pulled off the plant. Chamomile can grow in tropical regions, but it needs a cool, well-draining spot to avoid heat stress warm Southern state. Speaking of which, leaves alone won't root into a new plant. If you've seen that question come up around whether hibiscus can grow from leaves, the short answer is no, not reliably. If you were wondering can hibiscus grow from leaves, this stem-node method is the part that actually makes propagation reliable hibiscus can grow from leaves. You need actual stem tissue with nodes for this to work.
Within stem cuttings, there's a spectrum: soft tip cuttings (the very green, tender new growth), semi-hardwood (slightly firmer stem that's not fully brown or woody), and hardwood (fully mature, woody stems). For beginners, semi-hardwood cuttings are the sweet spot. They root more easily than fully soft growth, which wilts and rots quickly, and faster than hardwood, which takes much longer to respond.
When to take cuttings based on your climate and zone
Timing really does matter here, and your location changes the window. Gardenia also recommends propagating tropical hibiscus (Hibiscus rosa-sinensis) with semi-ripe cuttings in late spring or early summer Timing really does matter here, and your location changes the window.. The universal principle is that cuttings root best when the parent plant is actively growing and temperatures are warm but not scorching.
| Climate/Zone | Best Timing for Cuttings | Notes |
|---|---|---|
| Tropical/Subtropical (Zones 9–11: FL, South TX, Southern CA, HI) | Late spring through midsummer (April–July) | Plants are in full growth mode; avoid peak summer heat above 90°F if possible |
| Warm Temperate (Zones 7–8: GA, SC, NC, Central TX, Pacific Northwest coast) | Late spring to early summer (May–June) | Wait until nights are consistently above 60°F before taking cuttings |
| Cooler Zones (Zones 5–6: Midwest, Mid-Atlantic, New England) | Early to midsummer (June–July) indoors or in greenhouse | Tropical hibiscus won't survive outdoors here; propagate indoors with grow lights and heat mat |
| Arid/Desert (Zones 8–10: AZ, NV, inland CA) | Spring before peak heat (March–May) | Avoid July–August when temperatures regularly exceed 100°F; root stress increases dramatically |
The ideal rooting temperature is 70 to 80°F (22 to 27°C). Below 65°F, rooting slows significantly. Above 85°F, cuttings start to stress and rot becomes more likely. If you're in a cooler zone and want to propagate tropical hibiscus, doing it indoors with a heat mat under the pot is the most practical solution. Hyacinth, however, needs consistent warmth and humidity to do well in tropical conditions tropical hibiscus.
How to take and prep your stem cuttings
This part is where a lot of beginners go wrong, usually by cutting from the wrong part of the plant or skipping the prep steps. Here's exactly what to do.
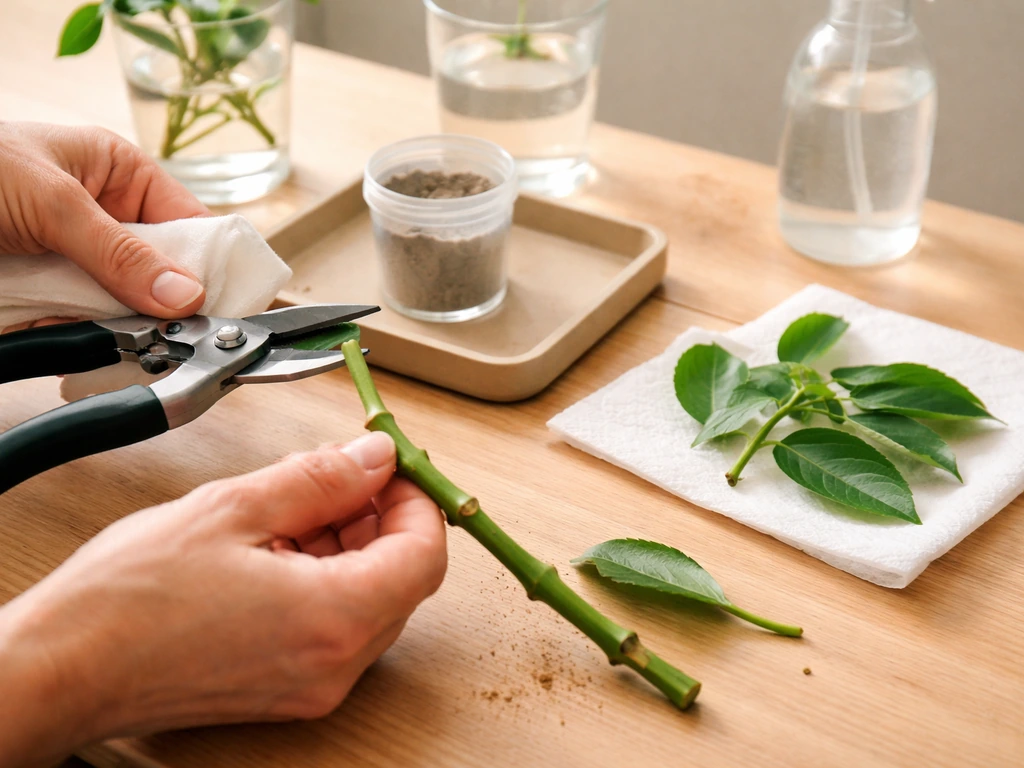
- Sterilize your cutting tool first. Wipe your pruning shears or sharp knife with rubbing alcohol or a diluted bleach solution. This step matters more than most people think because a contaminated cut can introduce rot-causing pathogens right at the wound.
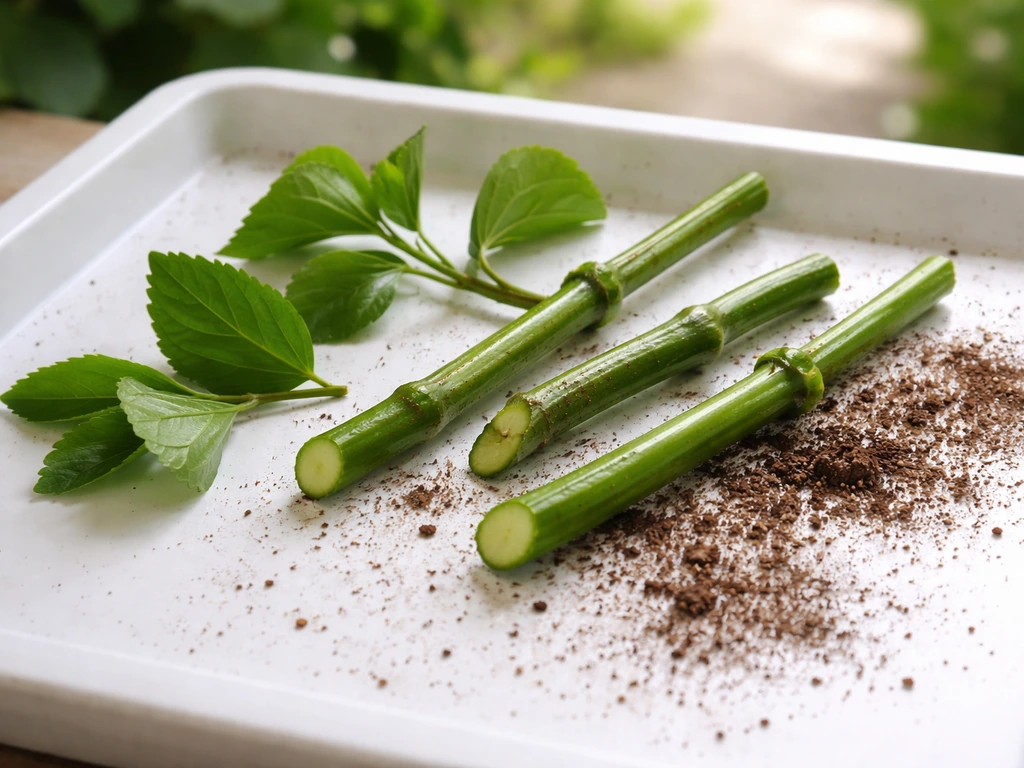
- Choose a semi-hardwood stem. Look for growth from the current season that has started to firm up slightly but isn't fully brown or woody. Avoid the very soft, floppy newest growth at the tips.
- Cut a 4 to 6 inch piece, making your cut just below a leaf node (the point where a leaf attaches to the stem). The node is where roots will form.
- Remove the lower leaves, leaving only 2 to 3 leaves at the top. This is important: too many leaves left on the cutting will cause it to dry out before roots have a chance to form, because the leaves keep losing moisture through transpiration.
- If you have large leaves remaining at the top, you can cut them in half to further reduce moisture loss. This is a common trick among hibiscus growers.
- Dip the cut end (roughly the bottom inch) into rooting hormone powder or gel. IBA-based rooting hormones are the most effective. Studies on Hibiscus rosa-sinensis have shown rooting percentages reaching 85 to 90% with IBA treatments, compared to significantly lower rates without it. It's worth using.
- Tap off any excess rooting hormone powder so you don't overdo it, and insert the cutting immediately into your rooting medium.
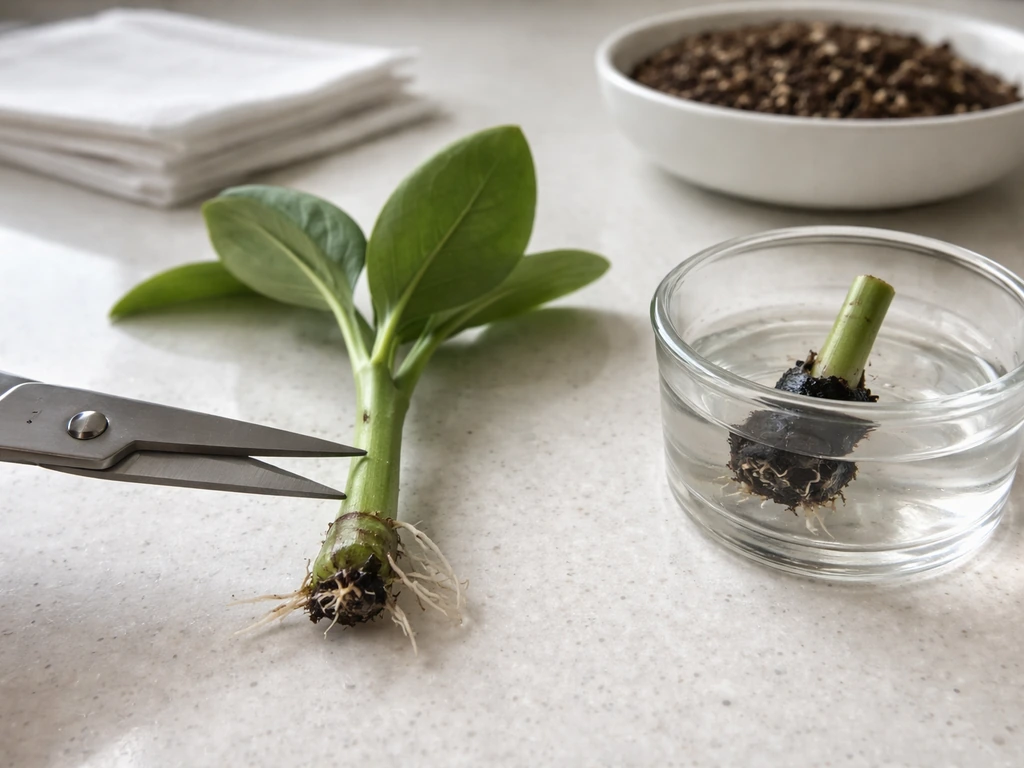
Water vs. soil rooting: which one to choose
Both methods can work, but they're not equal for hibiscus. Here's the honest breakdown.
| Method | Pros | Cons | Best For |
|---|---|---|---|
| Water rooting | Easy to monitor root development; no special materials needed | Roots that develop in water are often brittle and struggle to adapt to soil; higher transplant shock risk | Curious beginners who want to watch roots form, or when you have no other materials handy |
| Perlite (or perlite/sand mix) | Drains fast so rot risk is low; provides the air and moisture balance roots need; trusted by hibiscus societies | You can't see root development without checking; requires checking moisture manually | Best overall choice for rooting success and healthy root structure |
| Potting mix | Convenient if you have it on hand | Standard potting mix often holds too much water and increases rot risk at the cutting base | Only if you mix in significant perlite to improve drainage |
The recommendation from experienced hibiscus growers, including the Houston Hibiscus Society, is to use thoroughly pre-moistened perlite as your rooting medium. Saturate it fully before inserting the cutting, but make sure the pot or container drains freely so water doesn't pool at the bottom. Perlite holds just enough moisture while keeping enough air around the stem base to prevent rot.
Once you've inserted your cutting into the perlite, cover the whole setup with a clear plastic bag or place it inside a clear plastic storage bin to create a humid microclimate. Aim for 70 to 80% relative humidity around the cutting. This dramatically reduces how much the leaves dry out while roots are forming. Keep the setup in bright indirect light, not direct sun, which will cook the cutting.
After rooting: potting up, acclimating, and planting out
Roots typically develop within 4 to 6 weeks under good conditions. You'll know your cutting has rooted when you see new leaf growth emerging from the top, or when you gently tug the stem and feel resistance. Don't rush this check too early. Pulling up the cutting repeatedly disturbs developing root tips and can set you back.
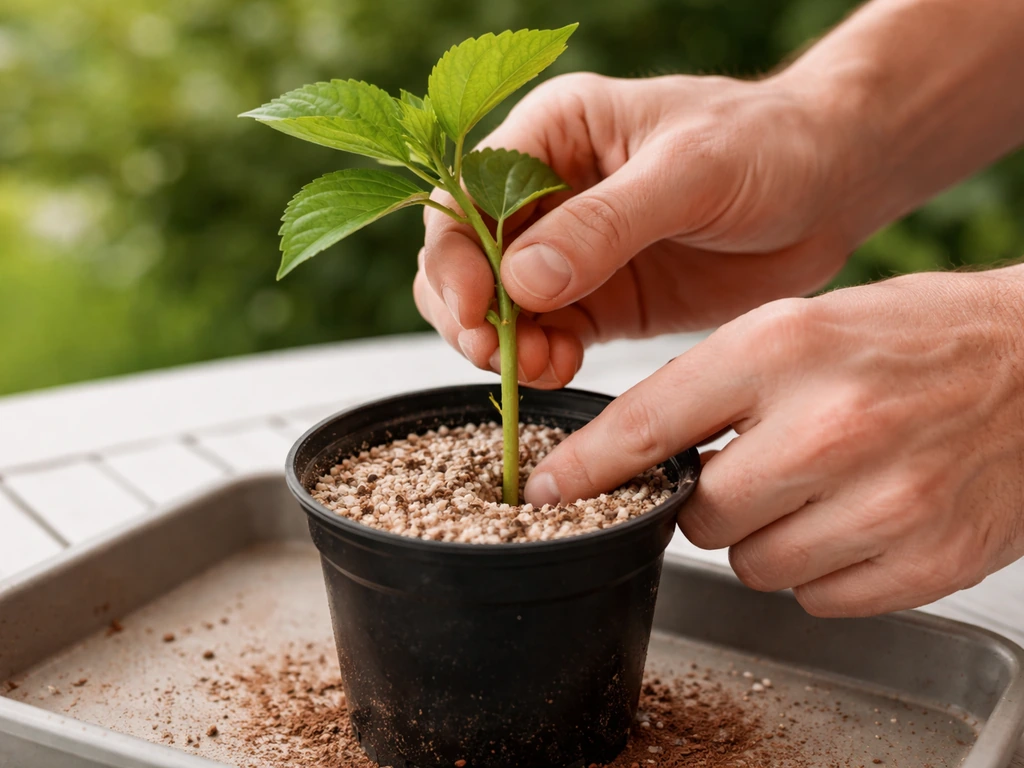
- Once rooted, pot the cutting into a small container (4-inch pot works well) filled with a well-draining potting mix. Add perlite to the mix if it feels dense.
- Keep it in bright indirect light for the first week or two after potting. Don't throw it straight into full outdoor sun.
- Start acclimating it to outdoor conditions gradually if you're planning to plant it in the ground or move it to a sunny spot. Move it outside for a couple of hours at a time, increasing exposure over 7 to 10 days. This prevents the sudden stress called transplant shock.
- Water consistently but don't overwater. The roots are young and sensitive. Let the top inch of soil dry slightly between waterings.
- Hold off on fertilizing for at least 3 to 4 weeks after rooting. The new root system is fragile, and fertilizer salts can burn tender roots.
If you're in Zone 9 or warmer and planning to plant your rooted cutting directly in the ground, wait until it has been growing actively in its pot for at least 4 to 6 weeks. A cutting that's been potted for a month or two will establish far more successfully outdoors than one transplanted right after rooting. If you're in a cooler zone where tropical hibiscus needs to overwinter indoors, pot it into a container you can bring inside rather than planting it in the ground.
Common failure points and how to fix them
Most propagation failures come down to a handful of repeated mistakes. Here's what to watch for and what to do.
- Cutting base turns black or mushy: This is rot, usually caused by waterlogged medium or contaminated tools. If caught early, you can re-cut the stem above the rot, re-dip in rooting hormone, and try again in fresh perlite. If the rot has progressed up most of the stem, start with a new cutting.
- No roots after 6 to 8 weeks: Check your temperature first. If the rooting environment has been below 65°F, roots stall. Move the setup somewhere warmer or add a heat mat under the container. Also check whether you used rooting hormone; skipping it noticeably lowers success rates.
- Leaves yellowing and dropping: Some leaf drop is normal as the cutting adjusts. But if leaves are yellowing rapidly, the cutting may be too cold, getting too much direct sun, or drying out. Check all three.
- Cutting dries out and shrivels: Usually means not enough humidity around it. Re-seal your plastic bag enclosure and make sure the perlite still has some moisture.
- Transplant shock after potting: New leaves wilt after moving to a pot or outdoors. Shade the plant for a week, water it in well, and give it time. Avoid fertilizing during this period.
- Some varieties just won't root: Certain exotic or specialty tropical hibiscus cultivars are notoriously difficult to root from cuttings. The Houston Hibiscus Society notes that grafting or budding is the preferred method for those harder varieties. If you've tried two or three times with good technique and still fail, the variety itself may be the issue, not your method.
One last thing worth knowing: not every cutting will root even when you do everything right. A 70 to 90% success rate is genuinely excellent for hibiscus cuttings. Taking three or four cuttings at once rather than just one dramatically improves your odds of ending up with a healthy new plant. Treat each attempt as part of a batch, not a single all-or-nothing bet.
FAQ
What time of year is best to take hibiscus stem cuttings?
Aim for when the parent plant is actively growing, typically late spring through summer for tropical hibiscus. In cooler regions, you can still succeed indoors, but avoid taking cuttings during the coldest, slow-growth weeks because new roots form much more slowly.
How long should the cutting be, and how many nodes do I need?
A practical target is about 3 to 6 inches (8 to 15 cm) long, with at least 2 to 3 nodes below or at the inserted portion. More nodes generally increase success, but very long cuttings are harder to keep from drying out.
Should I use rooting hormone for hibiscus cuttings?
You can, especially if your conditions are borderline cold or the plant is slow to grow. Use it lightly and consistently, and remember that temperature and humidity still drive the majority of results, so hormone is a boost, not a fix.
Do I need to remove leaves from the cutting?
Yes, at least from the lower portion that will sit in the rooting medium. Leaving lower leaves increases the risk of rot and fungal issues, while keeping a few top leaves helps the cutting generate energy for rooting.
Can I root hibiscus cuttings in water instead of perlite?
It is possible, but it is less reliable because hibiscus cuttings often struggle to transition from water to potting mix. If you try water, plan to transplant as soon as you see roots, and keep the water container clean to reduce rot.
How do I know if my cutting is rotting versus just rooting slowly?
Rot signs include a dark, mushy stem at the base, a foul smell, or leaves turning yellow quickly from the bottom. Slow rooting usually looks more stable, with green tissue and gradual new growth at the top, even if roots take the full 4 to 6 weeks.
Should I mist the cutting or just rely on the plastic bag humidity?
Avoid soaking or repeatedly wetting the leaves every day, because excess water can encourage leaf spot and stem rot. Instead, mist lightly only if the cover is drying out, and keep the medium evenly pre-moistened, not dripping wet.
What pot size and drainage should I use with perlite?
Use a small container with drainage holes, commonly around 2 to 4 inches (5 to 10 cm) for one cutting. If water pools under the pot, the stem base will sit oxygen-starved, which increases rot even in perlite.
Can I propagate multiple hibiscus cuttings in one bin or container?
Yes, as long as each cutting has its own section of medium and the stems are not crowded. Crowding reduces airflow around stems and raises humidity unevenly, which can lead to one rotting cutting infecting others.
When is it safe to remove the plastic cover?
Start venting gradually once you see clear top growth, not just swelling. For example, open the cover for short periods first, then extend time over several days to prevent transplant shock.
Should I fertilize the cutting after it roots?
Wait until it shows active new growth in its pot, then use a diluted, balanced fertilizer. Early fertilizing while the cutting is still establishing roots can stress it, especially if the light is still moderate.
Why did my rooted hibiscus cutting die after transplanting outdoors or to a new pot?
The most common cause is sudden light and temperature change. Harden it off by increasing sun exposure gradually and protect it from cold snaps or intense afternoon heat for the first couple of weeks.
Is it possible to root hardwood or soft-tip hibiscus cuttings successfully?
Yes, but success varies. Soft tip cuttings root more slowly and are prone to wilting and rot, while hardwood cuttings often take much longer to break dormancy and form roots. Semi-hardwood is still the best beginner option.
What success rate should I realistically expect?
A 70 to 90% success rate is a strong outcome for hibiscus stem cuttings under good conditions. To improve results, take a small batch and keep the environment consistent, because a single variable like temperature can reduce success quickly.